Monday, December 31, 2012

Homemade Deep Conditoner

Hey Loves!!!
Rissa here with another great tip!

With harsh Winter weather approaching it takes a toll on our beloved locks, hair that is! So I have just the thing to moisturize and liven up those strands! A deep conditioning treatment.
This is my favorite homemade deep conditioner, I have been using this for myself and Cori Rae for over a year now and it works great. Lets get right to it.

Items Needed:
  • Aubrey Organics Honeysuckle Rose Moisturizing Conditioner (or any conditioner you like)
  • Raw honey
  • Coconut Oil
  • Rosemary Essential Oil
  • Bowl
  • Spoon


So here is what you need to do. I don't have exact measurements, I mostly just eyeball it and mix it up according to what my hair needs and of course hair length is important too. The longer the hair the more product you will need.

Put desired amount of Coconut Oil and Honey in the bowl

Microwave for 10 seconds just to soften the oil and honey

This is what it looks like after microwaving

Add your conditioner

Add the Rosemary Essential oil


Mix it all together

Apply to the hair in sections for easier application. Then cover with a plastic cap.

Leave the conditioner on for 15-30 minutes then Rinse. Look at that face!

Style hair

She's so over getting her hair done now. Her and Mr. Ribbits needed a blankie break!


I use the Aubrey Organics conditioner because it is SOO moisturizing. The consistency of the product is super thick and creamy so a little goes a very long way and this also makes it a better conditioner for mixing with other ingredients.

Oh and here are few benefits from using the ingredients listed.
Honey- Adds shine and moisture and prevents breakage
Coconut Oil- Reduces protein loss
Rosemary Oil- Effective natural preservative and antioxidant. Also said to promote hair growth!

So there you have it. My fav homemade Deep Condish!

Do you make your own hair care products?
Share them in the comment section!

Tuesday, December 18, 2012

Not getting enough Zzzzzzz's?

Hey Loves!

If you are having trouble sleeping and have yet to find a remedy to this extremely annoying problem then I may have a tip that will help ya out!

Dr. Oz recently talked about sleep problems on his show and there are some interesting reasons why many of us may not be getting our best sleep. Check out what he has to say here.

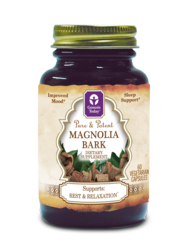
One of the things that I took from it is the tip about not using Melatonin and using Magnolia Bark instead.  This was suggested because the average amount of Melatonin a body needs is 1mg and if you notice most Melatonin supplements are available in 3mg or higher causing us to wake up groggy and well...sleepy. Hmmmm defeats the purpose right? So I decided to give this Magnolia Bark a try. I ordered mine from Vitacost and I have been using it for about a week now and I must say I have experienced good results thus far!


I feel more rested in the mornings, if I wake in the middle of the night I have no problems falling back asleep. And the best part about the Magnolia Bark is that you can also take it any time of the day if you are feeling stressed and it helps you calm down. This is definitely a keeper for me! Now as far as the price at $21.59 for 60 capsules this may seem somewhat expensive BUT if you are in serious need of help with your sleep then this maybe worth the price tag. Give it a try.


What are some things you do to help with sleep? Have you tried Magnolia Bark? If you use Melatonin will you be changing to Magnolia Bark?


Sunday, December 16, 2012

Organize those recipes.

Hey Loves!
Rissa here with another tip! This one is all about food! Yaaay!
I don't know about you guys but for me cooking for my family can sometimes be the most dreadful part of my day, simply due to the fact I don't know what in the world to cook! So I end up stuck in the kitchen fumbling around until I come up with something that either the Hubs and the babies don't like or I just end up microwaving something. It is very important to me that I make healthy and tasty meals for my family so in order to do so without all the stress I decided that maybe a recipe binder would be a helpful tool!
This binder not only houses all of our favorite recipes but it also keeps recipes we would like to try, grocery list printouts, food inventory, meal planning printouts (post on this later), freezer cooking printouts (post on this later), and much more. This binder has been such a big help here in the Cunningham house and dinner time is a breeze now! So if you are interested in putting together your own binder keep on reading and lets get right into it.

Items Needed:
  • 3 ring binder
  • Card-stock
  • Glue
  • Tab dividers (12)
  • 3-hole punch
  • Your recipes
  • Page protectors
Now as far as how you put your binder together this is totally up to you. I have seen so many different versions of how people organize their recipes and I took things that I liked and applied them to my own.

Step 1.) Determine how you want to categorize your recipes. I categorized mine in this order:
  •  Meal Planning  (this is where I put all of those printouts and food inventory)
  • Beef
  • Breakfast
  • Chicken
  • Crockpot
  • Drinks
  • Pork
  • Seafood
  • Sides, Breads, Butters
  • Snacks
  • Soups
  • Sweets
Step 2.) Type those hand-written recipes and print them out. Glue them to card-stock to make them sturdy. Put them into the page protectors.

Step 3.) Label your tab-dividers.

Step 4.) Arrange your recipes in the binder accordingly.

Step 5.) Cook one of those favorite recipes and pat yourself on the back because you are awesome! ;-)

My supplies and yes that would be a glass of Shiraz, I try not to do many projects in the Cunningham home with out it! ;-)


Recipe from a magazine

Tab divider labeled


Typed recipe

Binder is complete!


Now that your recipes are all together in one fabulous place, you are ready to start meal planning! This too has been extremely helpful for meal time here. My next post will be about how I plan my meals by freezer cooking and using a weekly menu so stay tuned!
Do you have a recipe binder?

Boots playing dominoes?

Hey loves!
     I know I've been M.I.A. but I'm back with a new tip! Now if you are a shoe fanatic like myself then your favorite thing about cold weather is.....BOOTS of course! Well for the longest I have had the hardest time finding a solution for keeping my tall boots standing in my closet. I know you gals have to feel me on this, you get your boots all nice and neat in the closet and then like dominoes they all start falling over Drives. Me. Crazy. Uggggh
  
     So here's what I came up with, are you ready for it?! This is so easy and inexpensive you won't believe it. Ok so all of those Parent Magazines or Vogue or Cosmopolitan or Good Housekeeping (you get the point) that you have piling up around the house, gather them up and head to your closet.
Roll one magazine for each boot, slide it in and Presto! Standing boots! So simple right?


I have been using this idea for a couple of months now and so far so good! How do you keep your boots standing?